A photo description of my Yeasu 897D in a portable pack. |
| Here's my radio on my desk. I occasionally try using a homemade 20m dipole inverted L out the window, with slight success in the digital modes. I still have to take the radio outside to get any real reception. Custom radio cover by Stan at: http://radiodustcovers.com/ Not too expensive. |
 |
| Same spot, cover off, Yeasu 897D with LDG-897 tuner attached. Yeasu carry handle is still attached, but will be leaving us later . . . |
 |
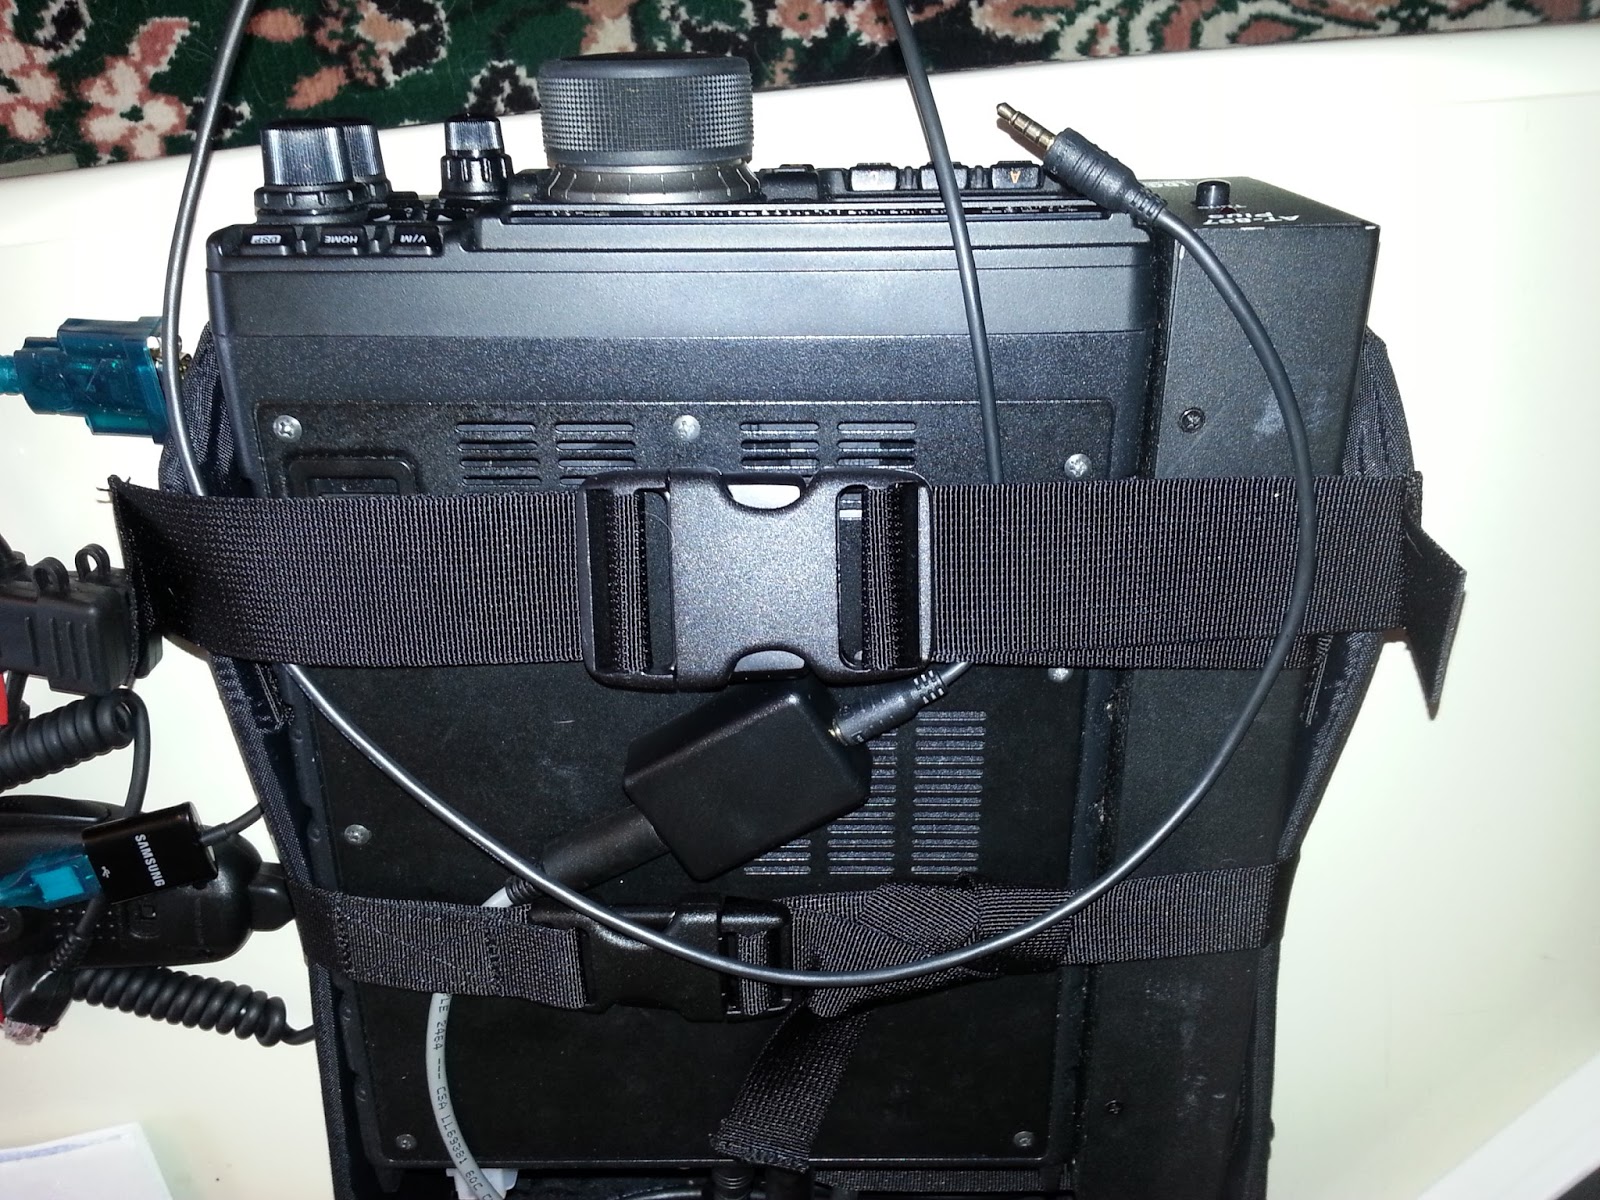
Hook-ups on the back of the radio, antenna cable coming into the LDG tuner, pl-259 jumper to radio, data and CAT connections. Compare this later to the radio in the holder, as they won't be as visible there. Later on I wound up adding L-shaped adapters to the pl-259 connectors to further reduce cable stress |
 |
| Kelty radio holder with elevator strap, purchased from Amazon (third-party sale). elevator strap is crucial, as the only way this will hold the Yeasu and attached LDG is with the back of the radio facing the pocket in the bottom of the photo, so the cables can move around yet not actually rest on them when the holder is vertical in a backpack. Elevator strap slips between the various ports and pl-259 connectors at the back of the radio and thus keeps the radio up and not resting on the cables or connectors. |
 |
| Just the radio and holder side-by-side |
 |
| Good view of the elevator strap in back. Fits between pl-259 connectors and above CAT ports on the LDG, and under power, Data & CAT ports but above pl-259's of the radio. Again, the point is to suspend the radio vertically while in a pack so it doesn't rest on the cables/connectors. |
 |
| Cinched in, nice and tight. The Yeasu radio carry handle is now gone. Notice how perfectly it fits now - the handle made the side bow out badly, so I removed it. I guess that explains the screwdriver in the picture. |
 |
| Radio strapped in. |
 |
| Now just experimenting with how to run wires in a semi-permanent way. The goal is to make setting up the radio in the field take as little time and as few steps as possible, which means trying to avoid the need to attach cables once I'm onsite. This is a Wolphi digital interface (http://www.wolphi.com/) that will attach to your droid cellphone and do rtty and psk. took some trial and error for me to get it to work, but it allowed me to get started using digital modes cheaply. I like the digital modes because dx with a portable radio at 100 watts and a portable antenna (you'll see it below) makes it very hard to make dx voice contacts, but in the time I've been using digital I've already made several dx's with it. |
 |
| Kelty Battery Holder, attaches under the radio holder. |
 |
| That's a 10amp-hour LiFePo batter from K2 (http://store.peakbattery.com/12lfpba.html) and an Anderson power pole cable. You can just see, there's an internal divider in the batter holder, just to the right of the battery and running vertically. You could put another of these batters in there and they'd stay in place. The divider is velcroed in so you could remove it but I left it so that this one won't rattle around either. |
 |
| Battery case zipped up and just Anderson cable sticking out. |
 |
| Checking the fit in my backpack. |
 |
| Backpack - 5.11 Rush 72 |
 |
| Charging in the bag. |
 |
| You can't see it, but inside the bag is a set of fuses, which are between the battery and the radio. They're there to protect the radio from the battery, not the battery from its chargers, but they're harmless in that position even between the charger and the battery. |
 |
| So, off we go! My entire station is in that bag. If you ever get a qsl card from me, this is the park where I'm sitting in the picture I used. |
 |
| Radio in a bag, on a bench., antenna cable coiled in a front pouch/space. Notice the one piece going up and over the top of the bag? It enters the bag via hole usually used for a hydration tube. |
 |
| That's 25 feet of rg-8x mil-spec. The antenna is in the vertical pocket of the bag near the edge of the bench seat. |
 |
| Setting up. Cable is in place and that's the bottom half of an MP-1 Superantenna |
 |
| Setting up, different camera angle |
 |
| That's the whole antenna with a couple of radial wires sticking out. |
 |
| Ok, so now I've added the antenna cable to the setup. It feeds in via the hydration tube hole up top and I've fed it into an A/B switch like you see here, and then can choose to direct the antenna to either the radio or else the RE AA-54 antenna analyzer. |
 |
| Some don't believe you need the antenna analyzer when using a tuner but the MP-1 is a tunable multiband and I need to check the swr each time I set up or change bands. I hated the thought of adding wear and tear to my tuner because I had to keep removing the antenna feed to attach it the analyzer every time I setup or changed, so I went with the semi-permanent a/b solution. At least now the wear and tear is on the jumper cable and the a/b switch, and not the tuner. |
 |
| All set up. |
 |
| Also not visible is a Signalink USB, within the bag. The multitude of pockets, including one with zippers top and bottom, allows me to leave the majority of this wiring connected. Just needed to attach the two usb's to the laptop. |
 |
| So, up and operating, not counting pauses to step back and take pictures, in around 15 minutes once i reached my site. Only needed to setup antenna, attach batter power poles (I don't like to leave power attached unless I'm actually operating) and open the laptop. and I'm operating digital. |
 |
| Pack is back home, ready to recharge battery. |
 |
| Open bag and attach power poles from charger, no other changes to bag or existent cabling required. Notice that the AA-54 is missing. i couldn't bring myself to leave it attached, it's in the padded black case peeking out of a pocket on the 5.11 front cover. Radio stays in the bag and ready to go. |